Microsoft 365 access
To perform backup and restore operations, Corso requires access to your M365 tenant by creating an Azure AD application with appropriate permissions.
The following steps outline a simplified procedure for creating an Azure Ad application suitable for use with Corso. For more details, please refer to the official documentation for adding an Azure AD Application and Service Principal using the Azure Portal.
Create an Azure AD application
Sign in into the Azure Portal with a user that has sufficient permissions to create an AD application.
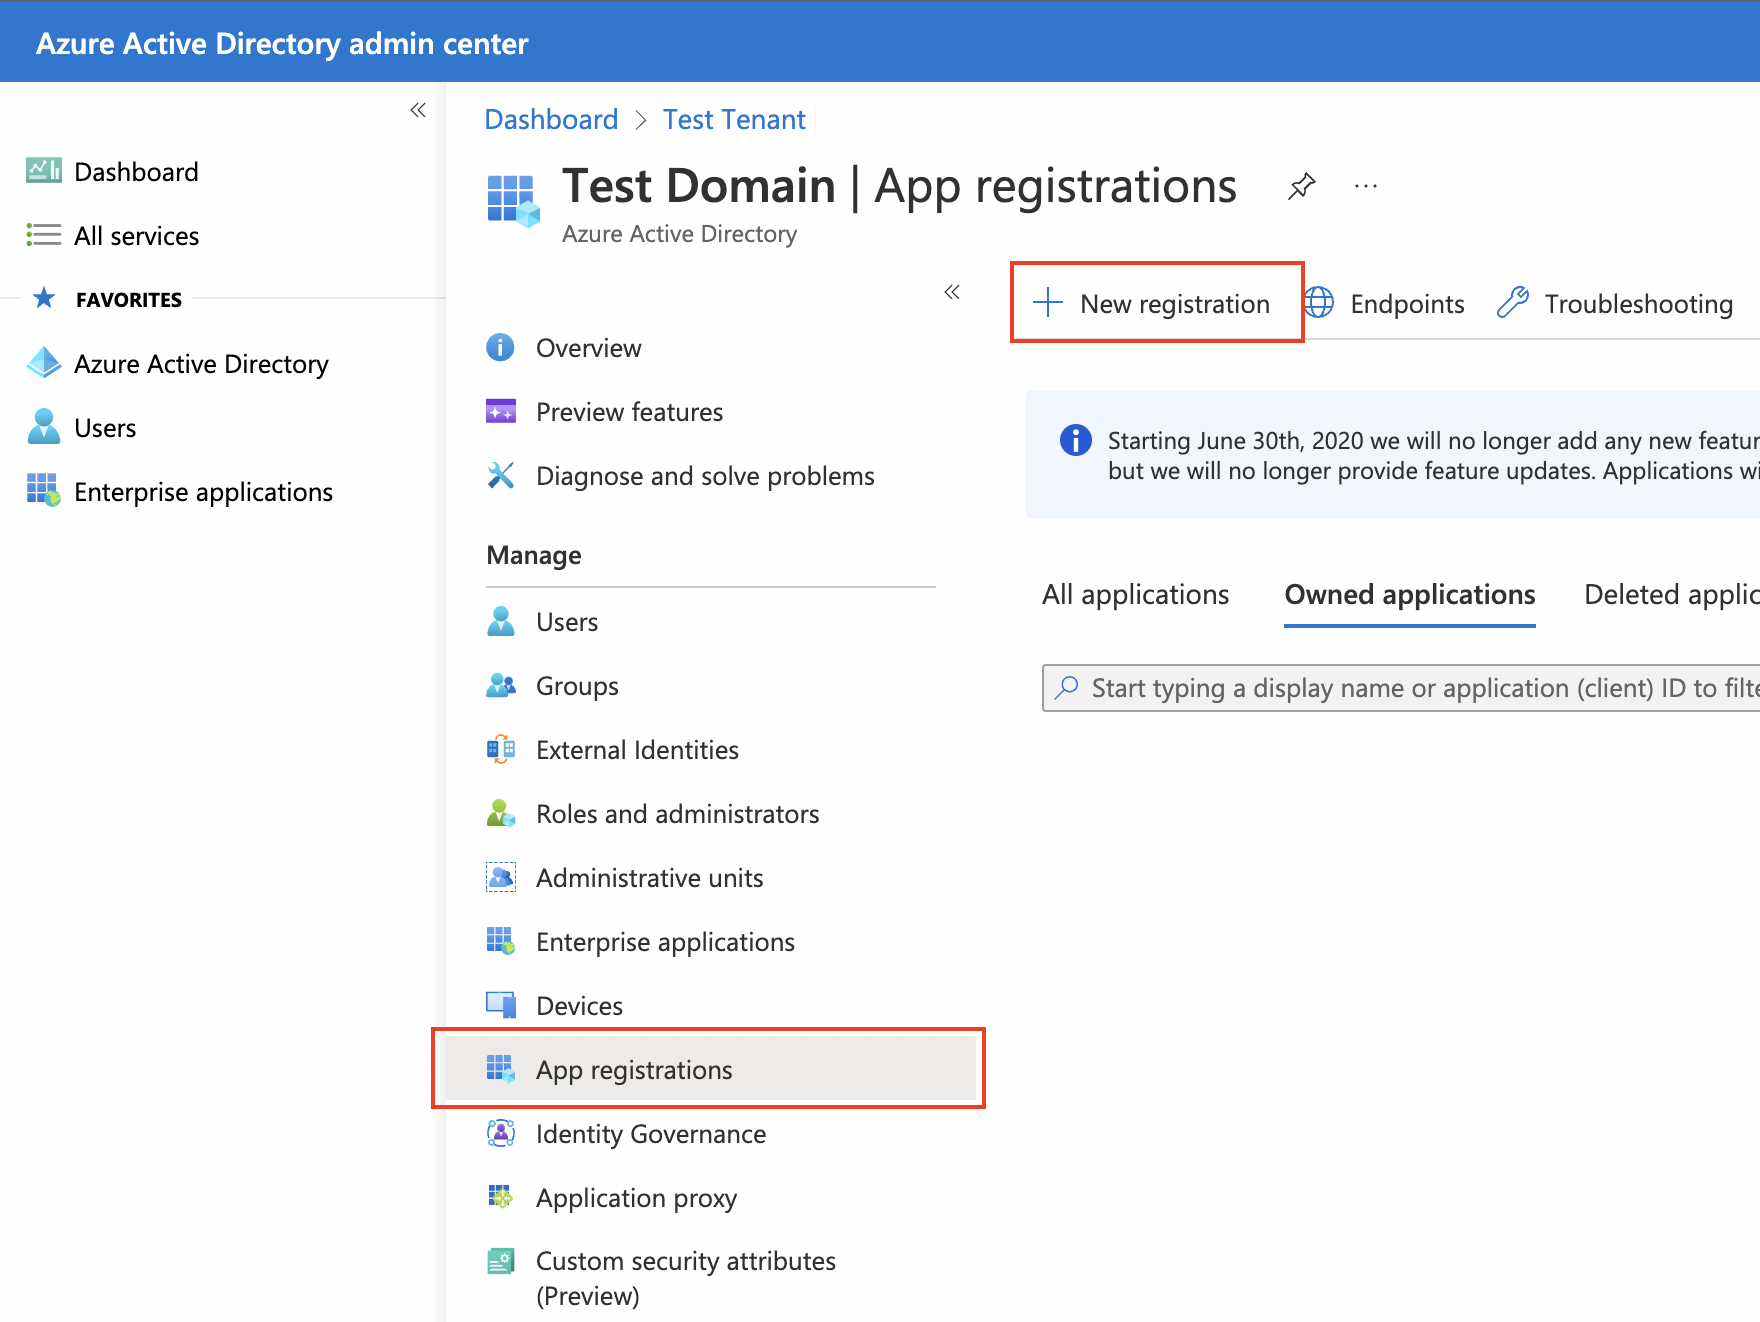
Register a new application
From the list of Azure services, select Azure Active Directory → App Registrations → New Registration
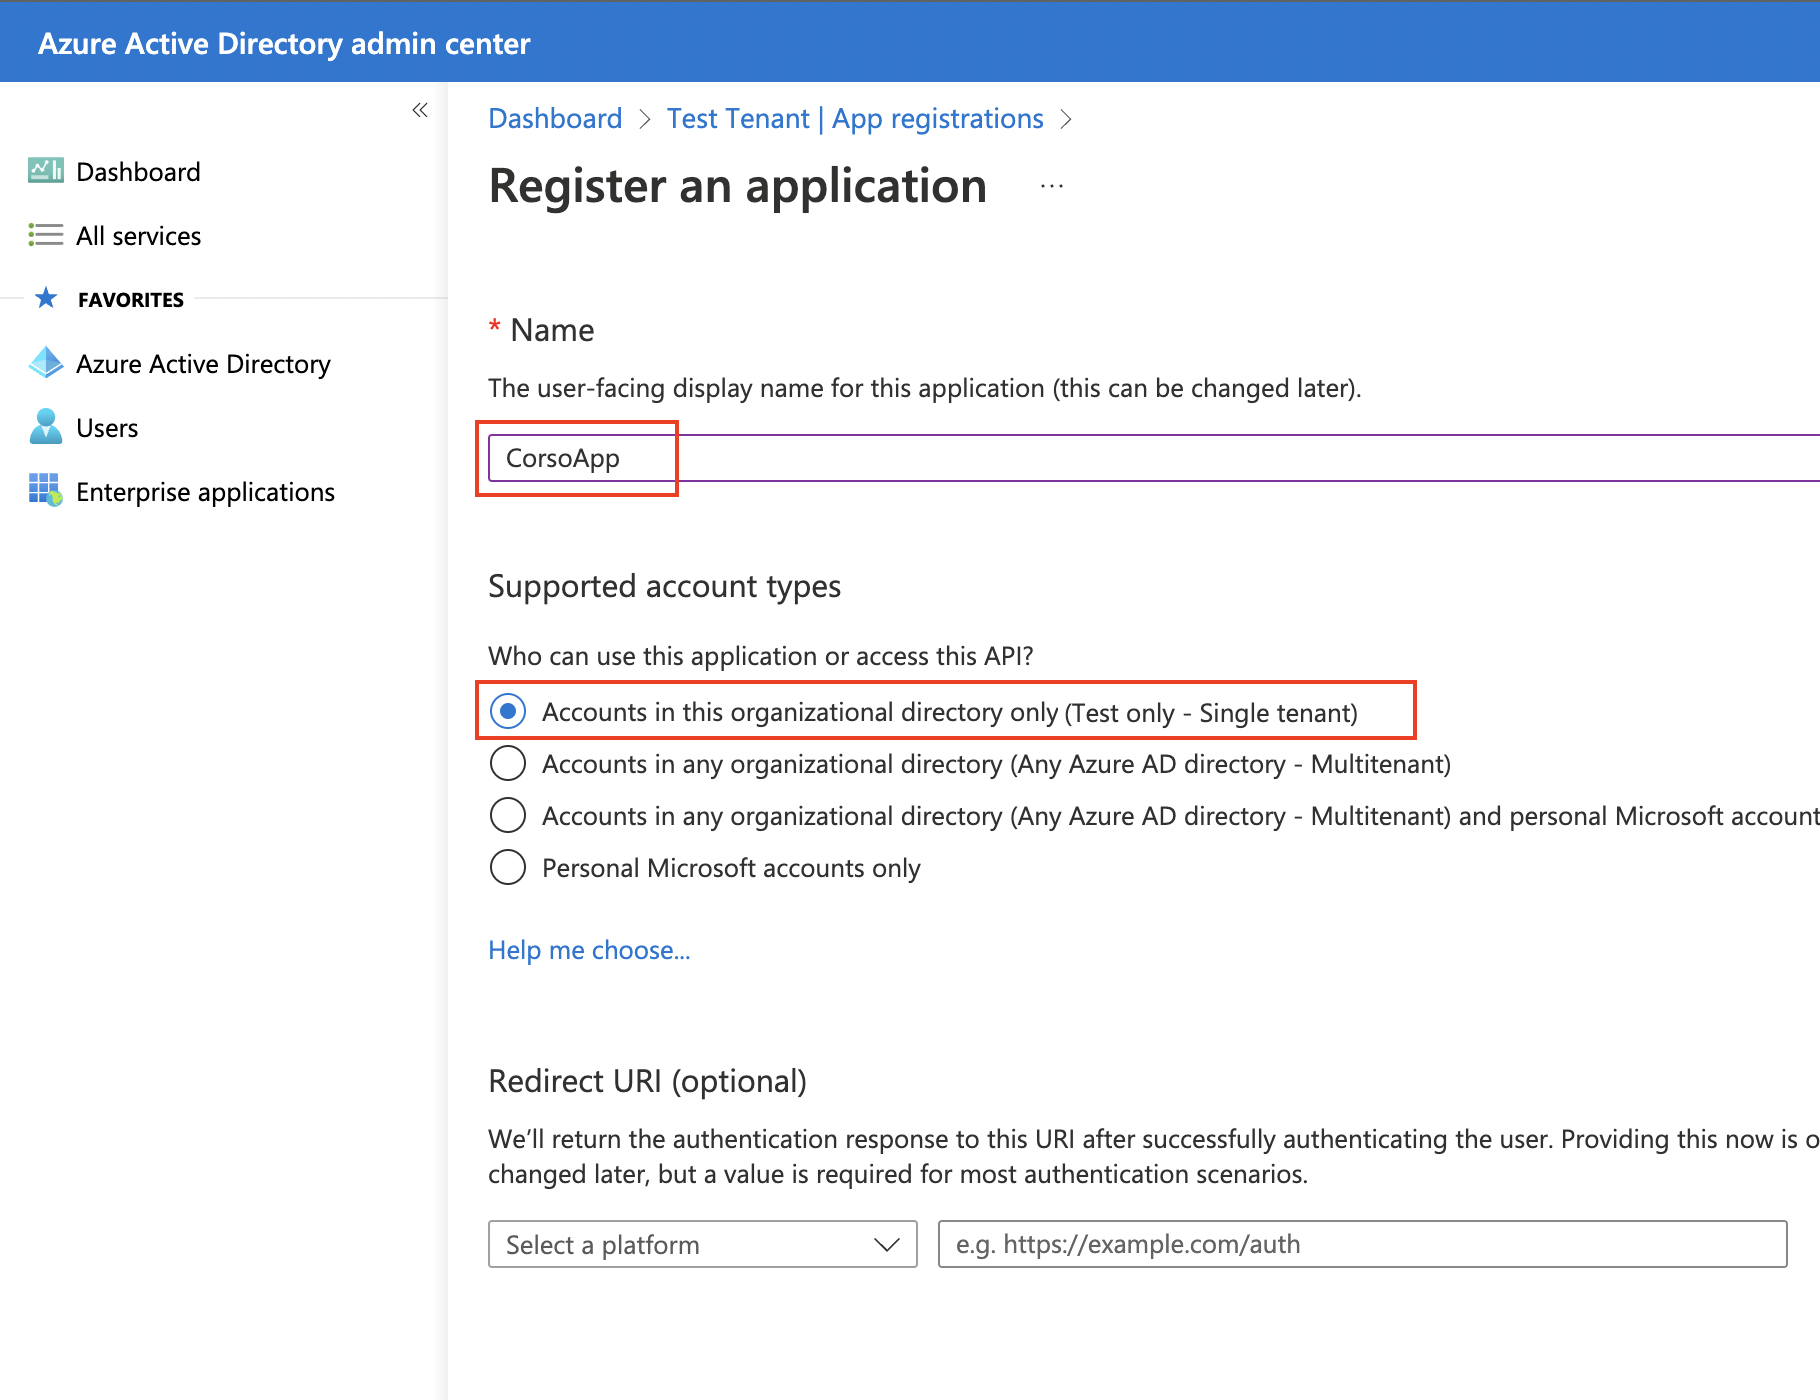
Configure basic settings
Next, configure the following:
- Give the application a name
- Select Accounts in this organizational directory only
- Skip the Redirect URI option
- Click Register at the bottom of the screen
Configure required permissions
Within the new application (CorsoApp in the below diagram), select API Permissions → Add a permission from
the management panel.
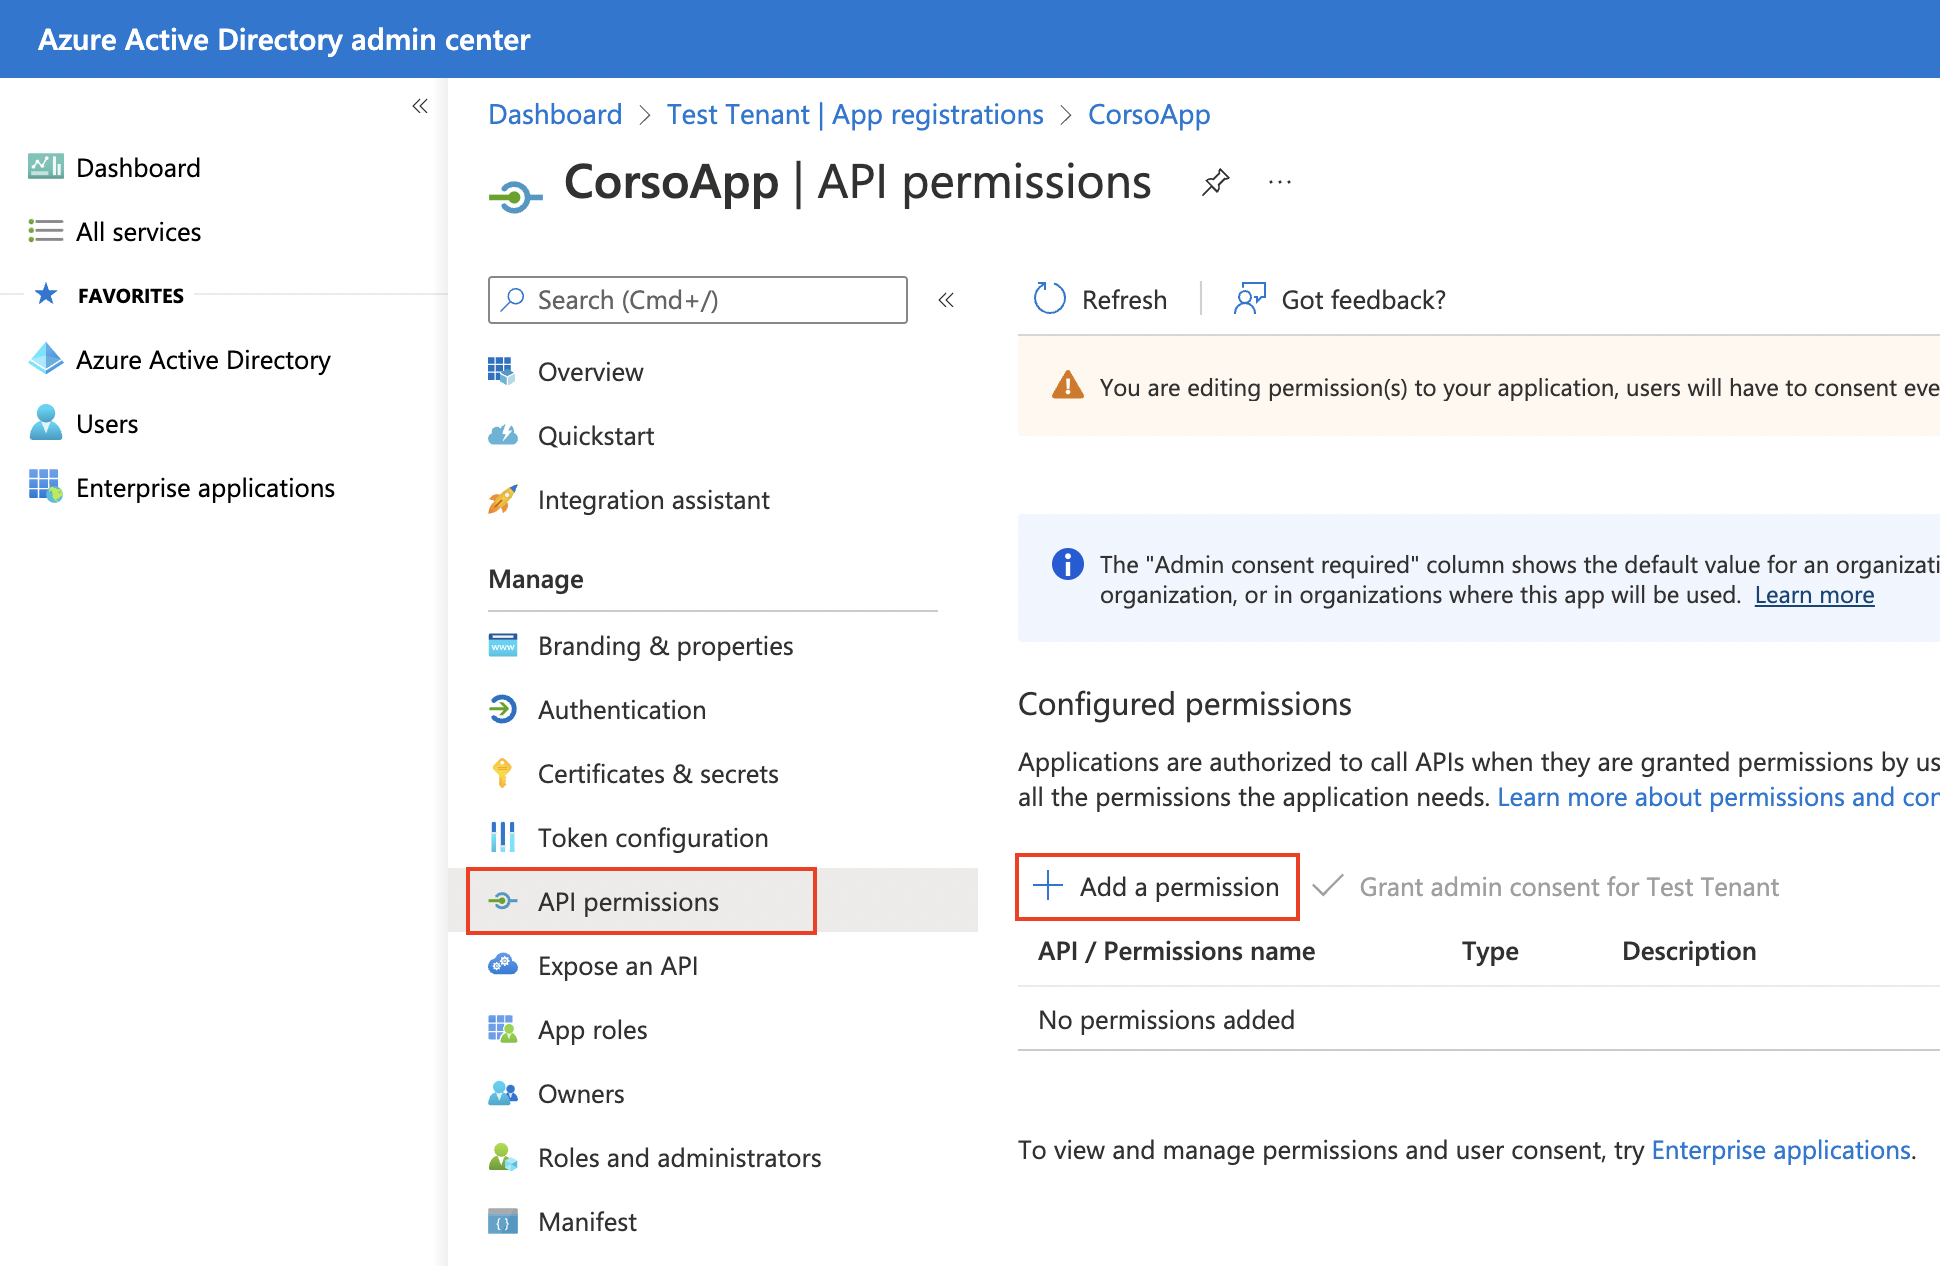
Select the following permissions from Microsoft API → Microsoft Graph → Application Permissions and then click Add permissions.
| API / Permissions Name | Type | Description |
|---|---|---|
| Calendars.ReadWrite | Application | Read and write calendars in all mailboxes |
| ChannelMessage.Read.All | Application | Read all messages in Teams' channels |
| ChannelSettings.Read.All | Application | Read all Teams' channel settings |
| Chat.Read.All | Application | Read all Teams' chats and chat messages |
| Contacts.ReadWrite | Application | Read and write contacts in all mailboxes |
| Directory.Read.All | Application | Read all organization directory data |
| Files.ReadWrite.All | Application | Read and write files in all site collections |
| MailboxSettings.Read | Application | Read all user mailbox settings |
| Mail.ReadWrite | Application | Read and write mail in all mailboxes |
| Member.Read.Hidden | Application | Read hidden group memberships |
| Sites.FullControl.All | Application | Have full control of all site collections |
| TeamMember.Read.All | Application | Read all Teams' user memberships |
| TeamSettings.Read.All | Application | Read all Teams' settings |
| User.Read.All | Application | Read all users' full profiles |
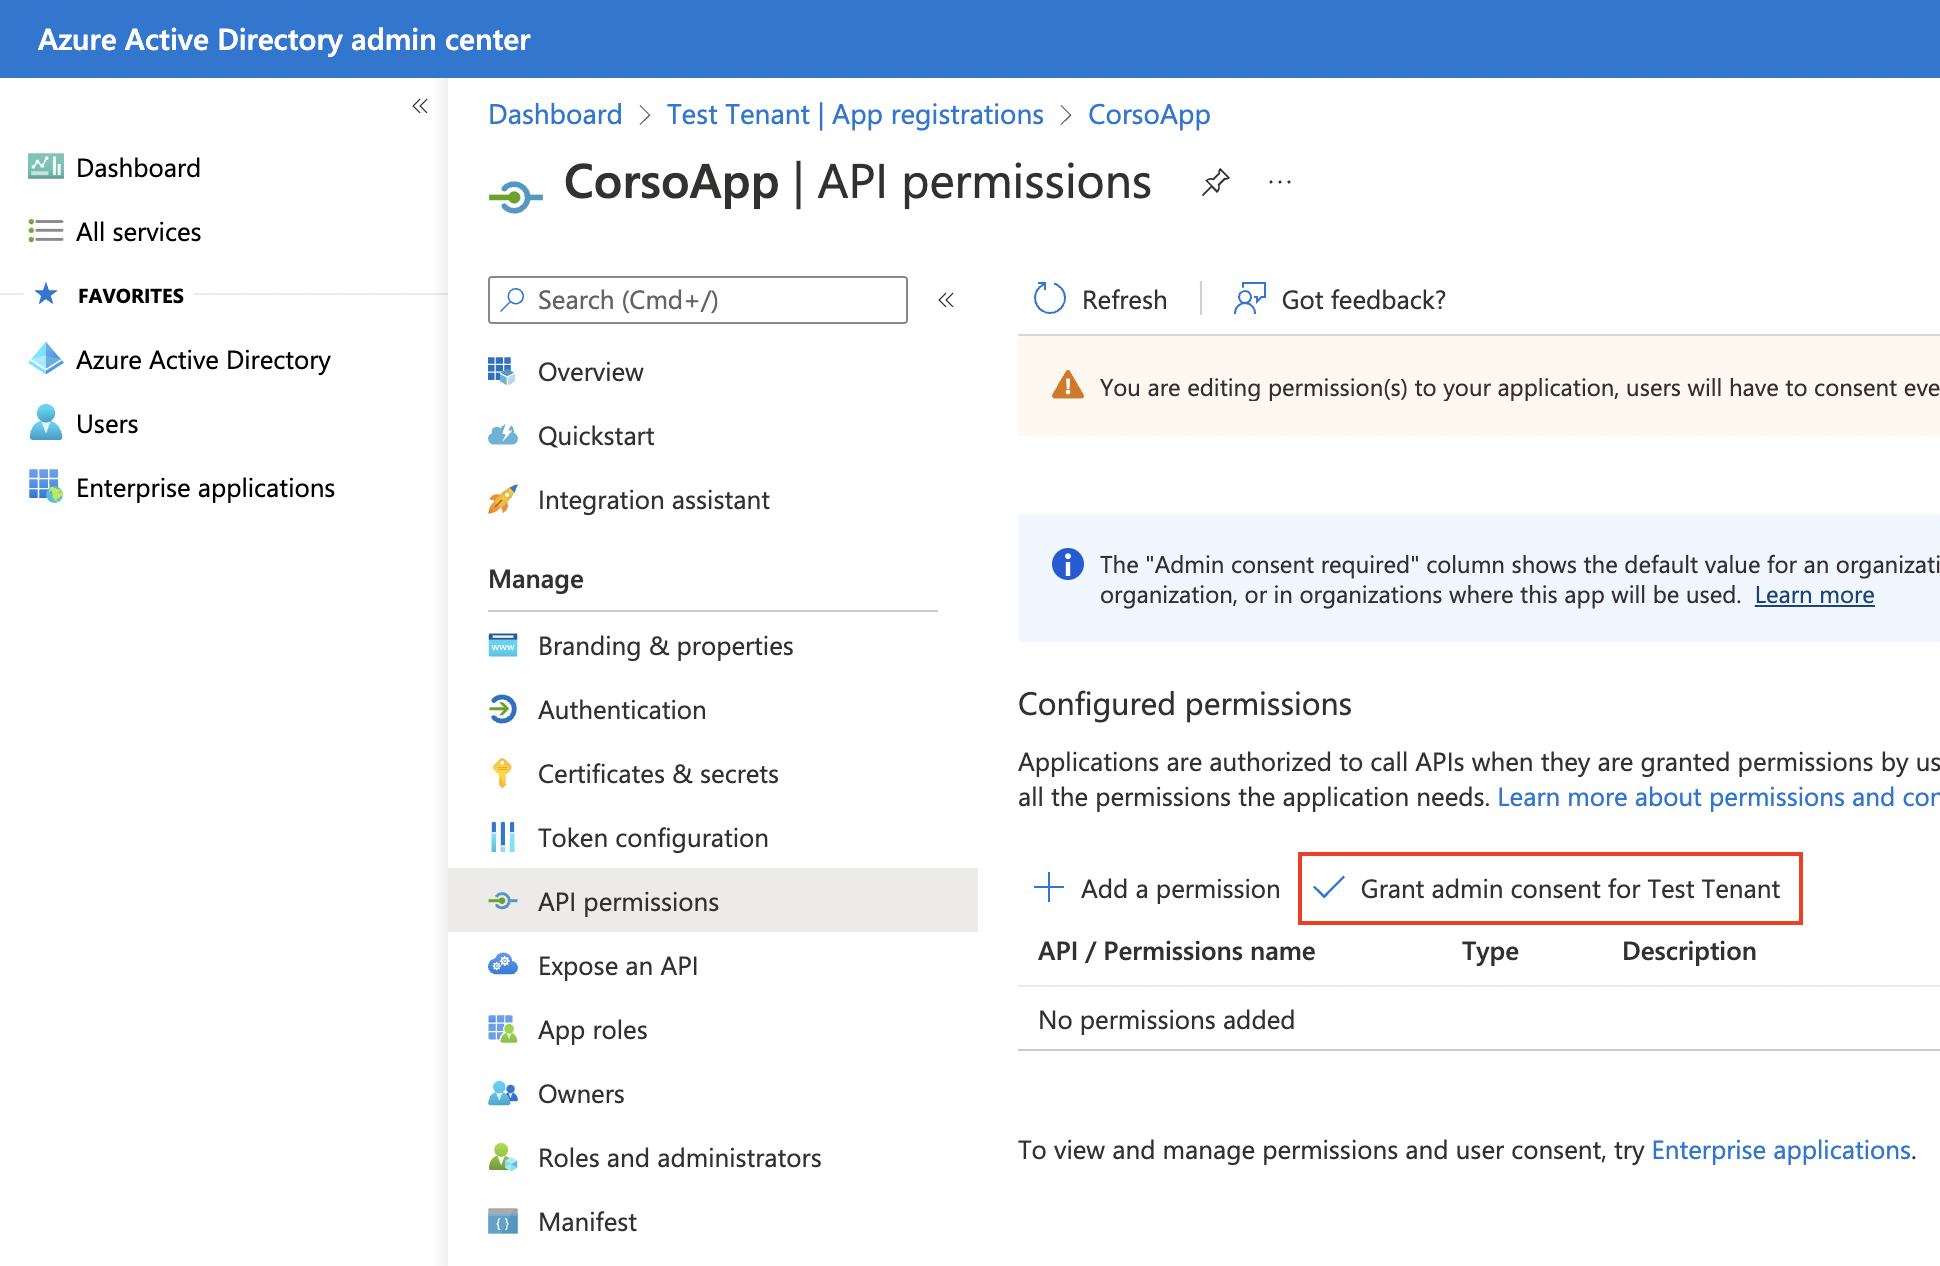
Grant admin consent
Finally, grant admin consent to this application. This step is required even if the user that created the application is an Microsoft 365 admin.
Export application credentials
After configuring the Corso Azure AD application, store the information needed by Corso to connect to the application as environment variables.
Tenant ID and client ID
To view the tenant and client ID, select Overview from the app management panel.

Copy the client and tenant IDs and export them into the following environment variables.
- Powershell
- Linux/macOS
- Docker
$Env:AZURE_CLIENT_ID = '<Application (client) ID for configured app>'
$Env:AZURE_TENANT_ID = '<Directory (tenant) ID for configured app>'
export AZURE_TENANT_ID=<Directory (tenant) ID for configured app>
export AZURE_CLIENT_ID=<Application (client) ID for configured app>
export AZURE_TENANT_ID=<Directory (tenant) ID for configured app>
export AZURE_CLIENT_ID=<Application (client) ID for configured app>
Azure client secret
Finally, you need to obtain a client secret associated with the app using Certificates & Secrets from the app management panel.
Click New Client Secret under Client secrets and follow the instructions to create a secret.
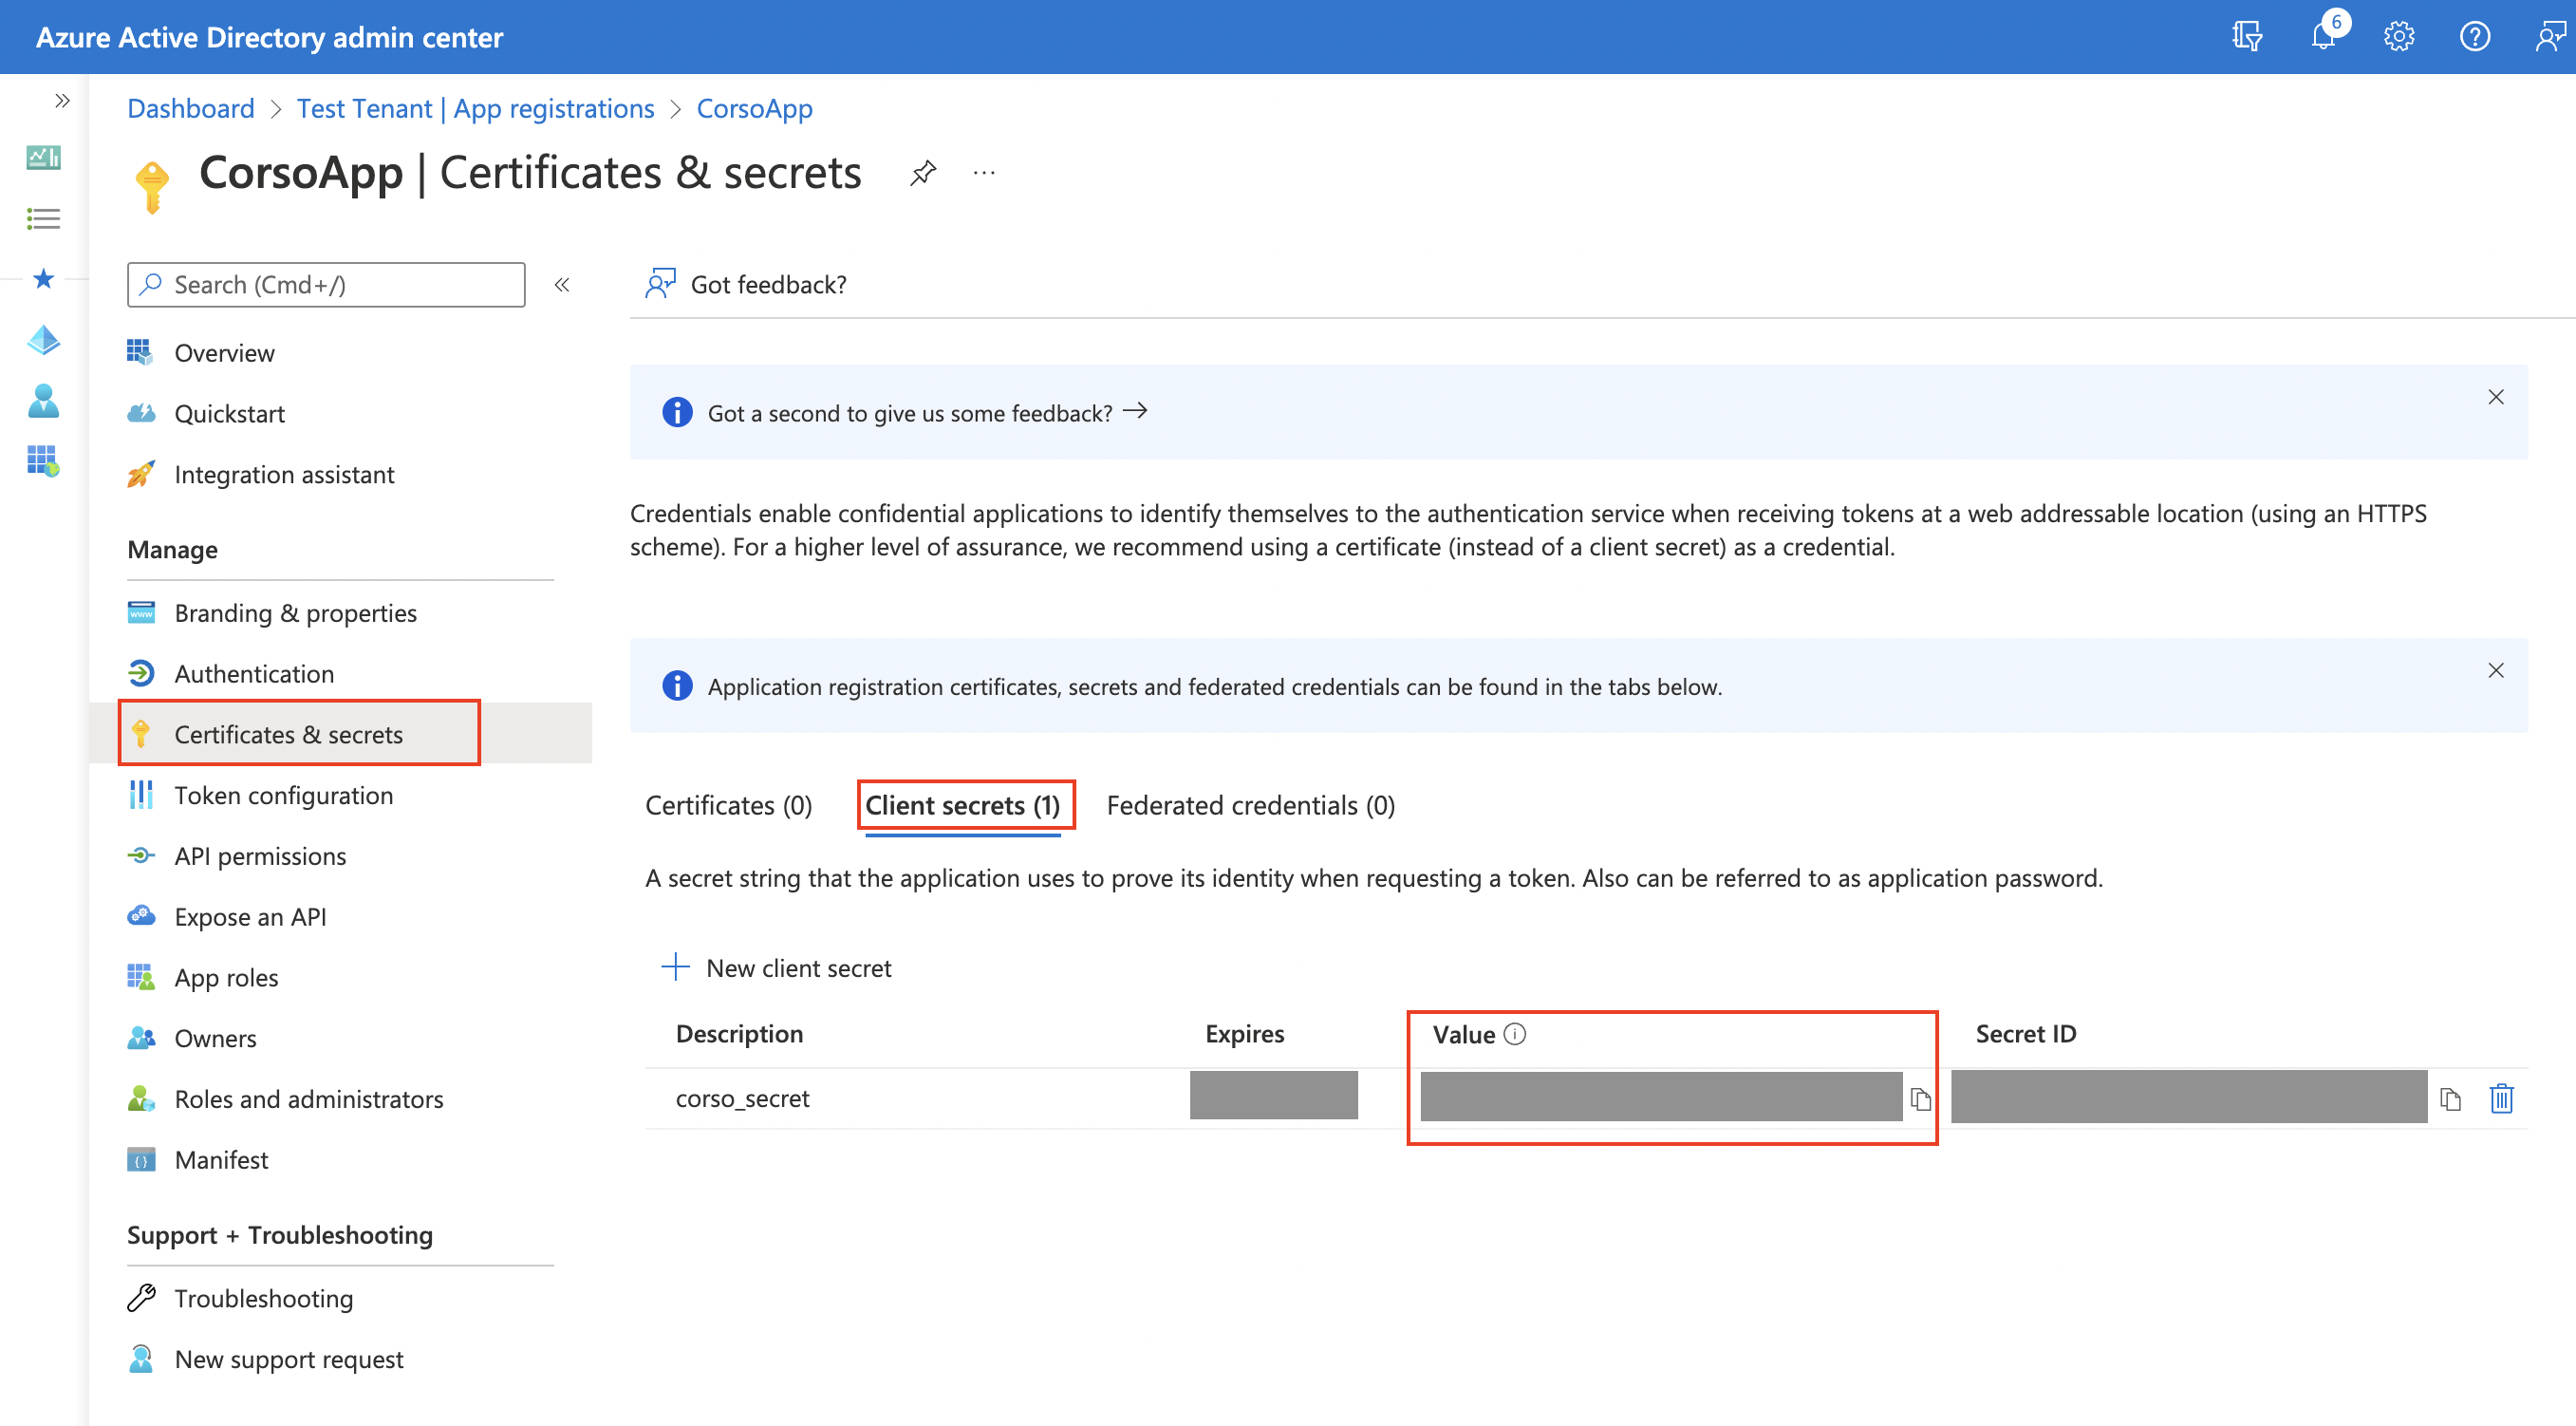
After creating the secret, immediately copy the secret Value because it won't be available later. Export it as an environment variable.
- Powershell
- Linux/macOS
- Docker
$Env:AZURE_CLIENT_SECRET = '<Client secret value>'
export AZURE_CLIENT_SECRET=<Client secret value>
export AZURE_CLIENT_SECRET=<Client secret value>